How to Remove Background Noise from Audio
This guide explains how to remove background noise from audio while keeping a close ear on the words you need. You can test the first 30 seconds for free in the tool here. Use the steps below to choose a useful source, compare the preview, and review the full download.
Free 30-second preview. No sign-up needed. Files are deleted after 7 days.

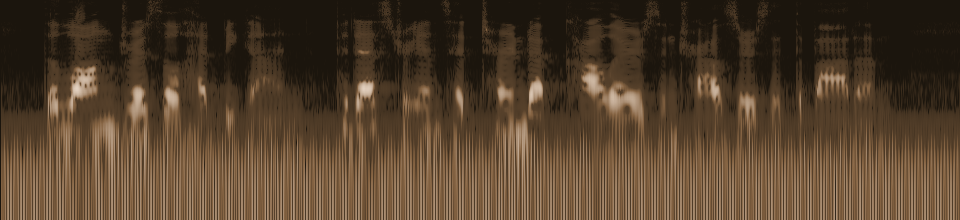

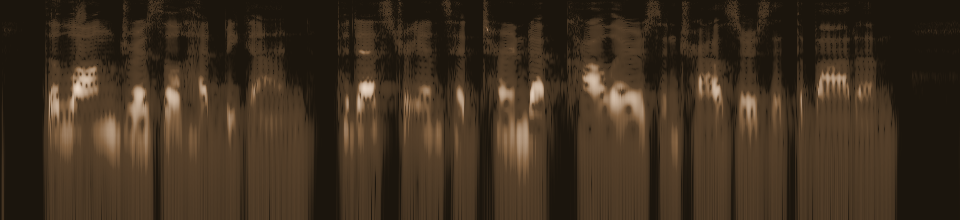
Both versions play at the same loudness, so you only hear the difference in noise.
LibriSpeech speech (CC BY 4.0), mixed with synthetic noise. Real AI output. Sources & license
1. Identify the sound you want to reduce
Listen to the unedited recording once before processing it. Note whether the problem is a steady fan, distant traffic, hiss, keyboard clicks, wind, or a mixture. Also note where the speaker is quiet and whether more than one person talks at the same time. These details tell you what to check in the preview. A constant hum behind a clear voice is different from a burst of wind that covers the word itself.
Write down one or two time points where the problem is obvious. If the first 30 seconds do not include those moments, trim a copy so the sample begins at a useful point. Keep the original intact. A preview of a quiet opening cannot tell you how a noisy middle section will sound.
2. Choose the least damaged source
Find the earliest, highest quality file you have. An original phone recording is usually a better starting point than an audio track exported repeatedly from a video editor. Lossy encoding can add artifacts, and a clipped microphone cannot be fixed by saving the file at a higher bitrate. If you have multiple takes, select the one with the clearest speech even if it contains more removable background sound.
The tool accepts MP3, WAV, M4A, AAC, OGG, and FLAC audio. It also accepts MP4, MOV, and WEBM video when you want to clean the soundtrack. A free preview upload can be up to 200 MB. Full files can be up to 2 GB and three hours, so export only the segment you need if your source is larger.
3. Upload and hear the free sample
Use the background noise remover to select the file, then choose the free 30-second preview. You do not need an account for this step. The tool prepares the original and cleaned portions from the start of your uploaded recording. When both are ready, play each version without changing your volume control. A fair comparison matters more than a dramatic volume difference.
If the browser cannot read the file duration or the preview upload is too large, make a shorter export from the original. Avoid applying another noise filter before this test. Two filters in sequence may remove more voice texture than either one alone, making it difficult to judge what helped.
4. Compare words, not just silence
To learn how to remove background noise from audio without harming speech, focus on a few spoken phrases. Are the first consonants still crisp? Does a low voice sound thin? Are pauses quieter without turning into unnatural pumping? Listen through headphones if you can, and replay the same words in both versions. A quieter background is useful only when listeners can still understand the person speaking.
Test places where noise and voice overlap. A model may reduce a fan during a pause yet struggle when a speaker whispers. Music behind narration is especially difficult because instruments and voices share much of the same sound range. Overlapping speakers also limit what a single cleaned track can preserve.
5. Decide whether the preview is representative
A long interview may include different rooms, microphone positions, or traffic levels. The first 30 seconds are only a sample, not a guarantee for the rest of the file. If the noise changes later, make another short copy with the difficult part at the beginning and test that section separately. You can compare more than one sample before paying for the complete job.
Severe distortion, clipped peaks, and words covered by a loud impact cannot be reconstructed reliably. If the cleaned sample makes those words worse, look for a backup take, a separate microphone track, or a chance to re-record. A sensible decision may be to keep the original or edit around the damaged sentence.
6. Estimate minutes before processing
Once you like the preview, sign in to start the full job. The service uses one credit per started minute. For example, a file lasting one minute and one second needs two credits. Credit packs are one-time purchases; unused minutes do not expire. The pricing page shows current packs and the refund policy before you pay.
If a full job fails, the reserved credits are returned. Processing time varies with duration and queue load. Leave the page open or return to your task later, and wait for the ready state before downloading. Avoid submitting duplicate jobs because each successful full job consumes its own minutes.
7. Pick an output that suits your next edit
Download WAV when you want to continue editing, mixing, or archiving an uncompressed audio result. Choose 192 kbps MP3 for a smaller file that is easier to share for review. For compatible video sources, the result is MP4: the original picture stream is copied and only the soundtrack is replaced with 192 kbps AAC audio. Other video streams are converted to H.264 for playback with source dimensions retained in the full export; previews may be reduced to 720p.
Play the downloaded file from start to finish. Check the beginning and end, plus every section you identified earlier. Confirm that speech remains intelligible, timing is right, and the export format fits your editor or publishing platform. Keep the original file for comparison and future changes.
8. Protect your source and improve the next recording
Uploaded source files and processed results are deleted after seven days. Download the result before then and store it with your original in a location you control. You can rename files to make the versions obvious, such as original, preview, and cleaned, without overwriting the only copy of your source.
Noise removal works more reliably when the voice was recorded clearly. Next time, move the microphone closer, turn off an avoidable fan, choose a quieter spot, and use a windscreen outside. Record a short test and listen back before a long session. These small choices make the recording easier to understand even before any software cleanup.
Frequently asked questions
Can I clean an entire file for free?
The first 30 seconds can be previewed for free without signing in. A complete processed download uses one credit per started minute from a subscription or one-time pack.
What if the noise starts after the preview?
Trim a copy so the noisy passage begins at the start, then preview that copy. The first 30 seconds should include the sound you need to judge.
Can it fix clipped or missing speech?
No reliable filter can recover words that the microphone did not capture. Compare the most damaged phrase and use another take when possible.
Should I download WAV or MP3?
WAV is useful for further editing because it is uncompressed. The 192 kbps MP3 is smaller and convenient for listening or sharing.
When are my files removed?
The service deletes uploaded sources and processed results after seven days. Save your download and retain your own copy of the original.